BMW R1200 throttle body Guide / Manual
List of compatible models
R 1200 GS air/oil cooling
2004 R1200GS
2005 R1200GS / ABS
2006 R1200GS HP2 / Adventure ABS / ABS
2007 R1200GS / HP2 / Adventure
2008 R1200GS / Adventure
2009 R1200GS / Adventure / Adventure Premium / Adventure / Premium / Standart
2010 R1200GS / Adventure / Adventure Special Edition / Special Edition
2011 R1200GS / Adventure / Adventure Premium / Premium / Standard / Triple Black
2012 R1200GS ABS / Adventure ABS / Adventure Premium ABS / Adventure Triple Black ABS / Premium ABS / Rally ABS / Standard ABS / Triple Black ABS / Triple Black Premium ABS / Triple Black Standard ABS
2013 R1200GS ABS / Adventure 90 Years ABS / Adventure ABS / Adventure Premium ABS / Adventure Triple Black ABS / Adventure Triple Black Premium ABS / Rally ABS / Triple Black ABS / Thriple Balck Premium ABS / Triple Black Standard ABS
R 1200 RT air/oil cooling
2005 R1200RT ABS
2006 R1200RT
2007 R1200RT ABS
2008 R1200RT
2009 R1200RT ABS / Premium ABS / Standart ABS
2010 R1200RT
2011 R1200RT ABS / Premium ABS / Standard ABS
2012 R1200RT ABS / Premium ABS / Standard ABS
2013 R1200RT ABS / Premium ABS / Standard ABS / 90 Years ABS
2014 R1200RT / Premium / Standard
R 1200 RT-P air/oil cooling
2005 R1200RT-P
2006 R1200RT-P
2007 R1200RT-P ABS
2008 R1200RT-P
2009 R1200RT-P
2010 R1200RT-P
2011 R1200RT-P
2012 R1200RT-P
2013 R1200RT-P
R 1200 R air/oil cooling
2006 R1200R
2007 R1200R
2008 R1200R
2009 R1200R / Premium / Standard / Touring Special
2010 R1200R / Premium / Standard
2011 R1200R / Classic / Touring
2012 R1200R ABS / Classic ABS / Classic Standard ABS / Standard ABS
2013 R1200R 90 Years ABS / ABS / Classic ABS / Classic Standard ABS
2014 R1200R / Classic / Standard
R 1200 ST air/oil cooling
2005 R1200ST / ABS
2006 R1200ST
2007 R1200ST
2008 R1200ST
R Nine T air/oil cooling
2014 R Nine T
2015 R Nine T
2016 R Nine T / Scrambler
2017 R Nine T / Pure / Racer / Scrambler / Urban G S
2018 R Nine T / Pure / Racer / Scrambler / Urban G S
2019 R Nine T / Pure / Racer / Scrambler / Urban G S
2020 R Nine T / Pure / Racer / Scrambler / Urban G S
R 1200 HP air/oil cooling
2006 R1200HP2
2007 R1200HP2 Megamoto / Enduro
2008 R1200HP2 Megamoto / Enduro
2009 R1200HP2 Megamoto
R 900 RT air/oil cooling
2003 R900RT
2004 R900RT
2005 R900RT
2006 R900RT
2007 R900RT
2008 R900RT
2009 R900RT
R 1200 BAJA air/oil cooling
2010 R1200BAJA
2011 R1200BAJA
2012 R1200BAJA
2013 R1200BAJA
2014 R1200BAJA
2015 R1200BAJA
2016 R1200BAJA
2017 R1200BAJA
2018 R1200BAJA
2019 R1200BAJA
2020 R1200BAJA
2021 R1200BAJA
RG 1200 GS air/oil cooling
2004 RG1200GS
2005 RG1200GS
2006 RG1200GS
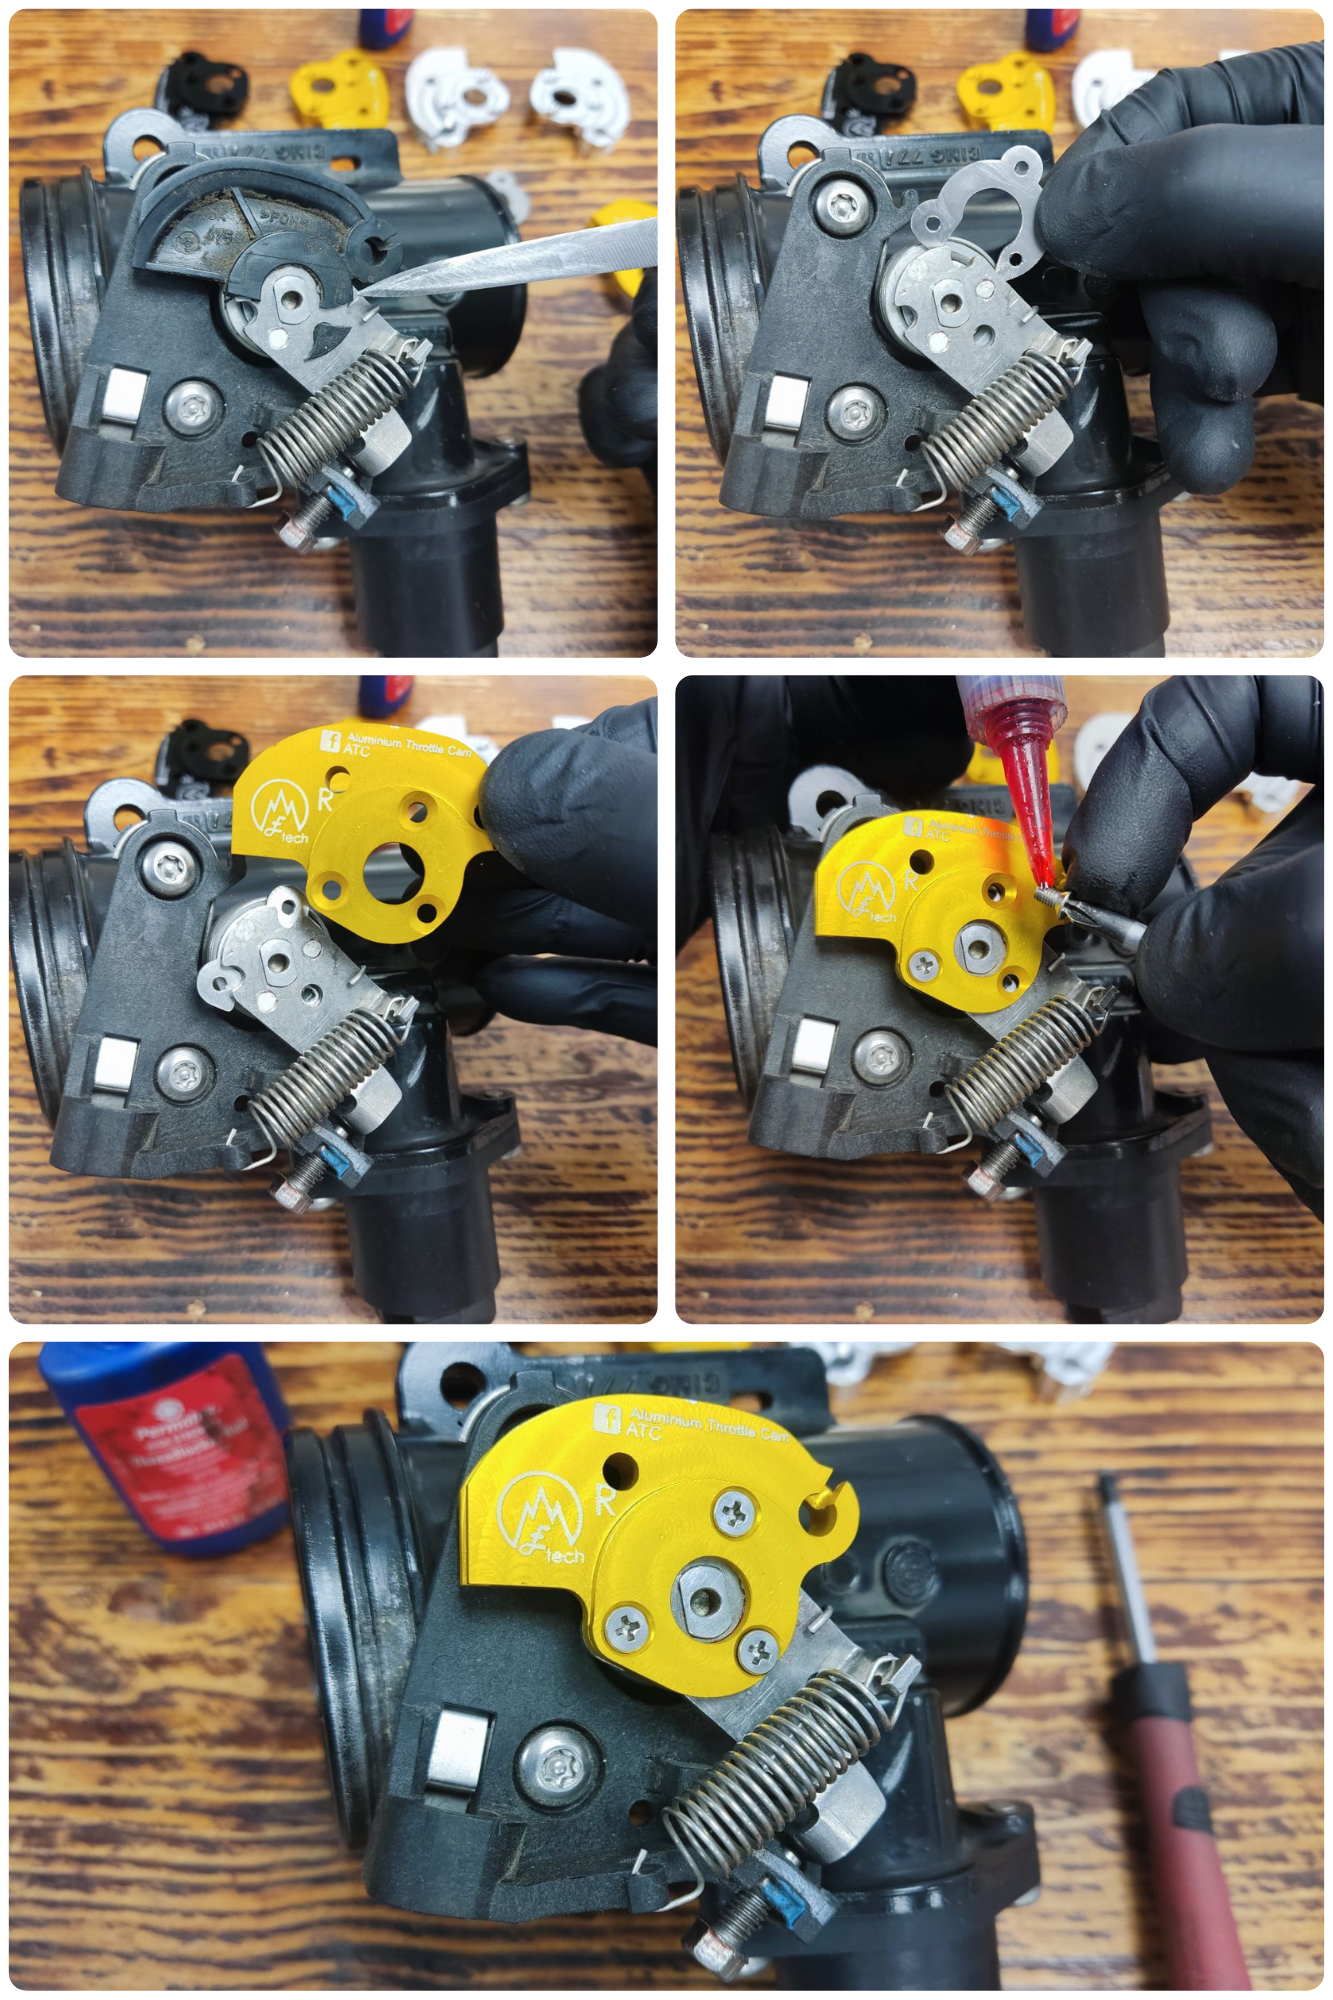
Installation Guide – Plug & Play
This updated guide covers the new plug & play version that requires no disassembly or drilling. Follow the steps and you'll have it mounted in minutes using only basic tools.