Ducati throttle body Guide / Manual
List of compatible models
Scrambler
Scrambler 2015 (Classic / Full Throttle / Icon / Urban Enduro)
Scrambler 2016 (Icon / Classic / Full Throttle / Urban Enduro / Italia Independent 800 / Flat Track Pro 800 )
Scrambler 2017 (Cafe Racer / Classic / Desert Sled / Full Throttle / Icon )
Scrambler 2018 (800 Brazil Special Edition / 800 Icon / 800 Full Throttle / 800 Classic / 800 Street Classic / 800 Desert Sled / 800 Cafe Racer / 800 Mach 2.0 )
Scrambler 2019 (800 Icon / 800 Full Throttle / 800 Desert Sled / 800 Cafe Racer )
Scrambler 2020 (Cafe Racer 800 / Desert Sled 800 / Full Throttle 800 / Icon Dark 800 / Icon 800 )
Scrambler 2021 (Nightshift 800 / Desert Sled Fasthouse 800 / Desert Sled / Icon Dark 800 / Icon 800 )
Scrambler 2022 ( 800 Nightshift / 800 Desert Sled Fasthouse / Desert Sled / 800 Icon Dark / 800 Icon / 800 Urban Motard )
Monster
Monster 2017 (797 / 797+)
Monster 2018 (797 / 797+)
Monster 2019 (797 / 797 Plus)
Monster 2020 (659 Learner Legal (Lams) / 797)
Monster 2021 (797 / 659)
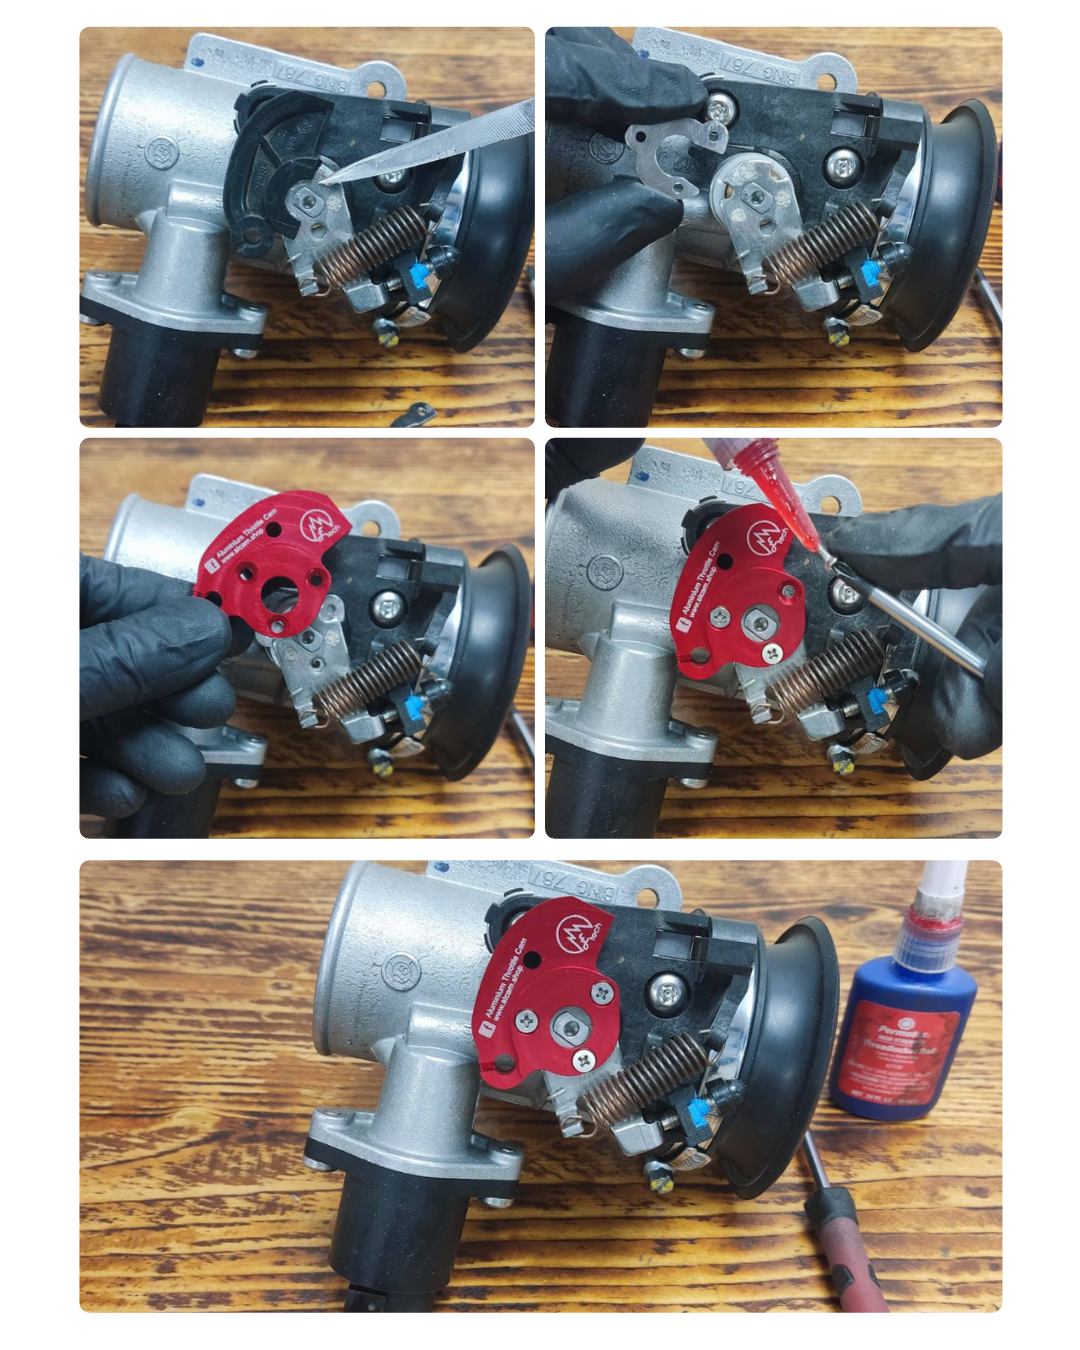
Installation Guide – Plug & Play
This updated guide covers the new plug & play version that requires no disassembly or drilling. Follow the steps and you'll have it mounted in minutes using only basic tools.